
HELP CENTER
Viewing timesheet details
From "Detail" in the Timesheets List, you can see the stamp times, overtime, distance, location, and history of a single timesheet.
Last updated: 2026-11-04
What you can see
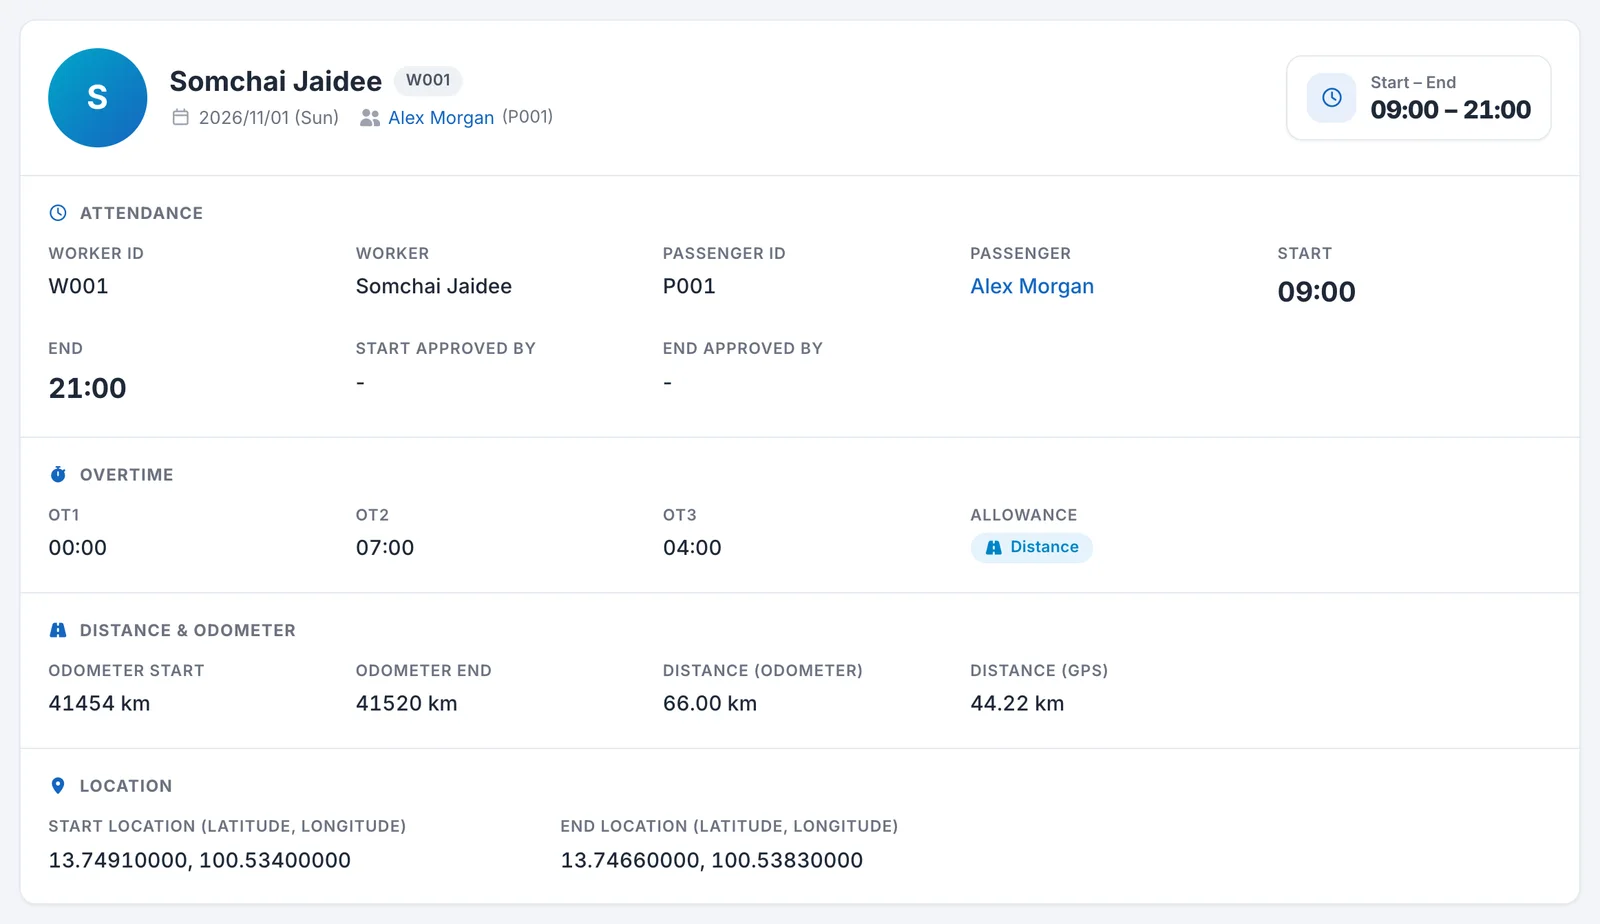
Click “Detail” in the Timesheets List to open the “Timesheet Detail” screen. The top shows the Worker’s name, the date, the assigned Passenger, and the times from start to end. Below that are the following sections.
| Section | Items |
|---|---|
| Attendance | Worker ID, Worker, Passenger ID, Passenger, Start, End, Start Approved By, End Approved By |
| Overtime | OT1, OT2, OT3, Allowance |
| Distance & odometer | Odometer Start, Odometer End, Distance (Odometer), Distance (GPS) |
| Location | Start Location, End Location (latitude and longitude) |
- “Start Approved By” and “End Approved By” show the name of the person who recorded or approved that time.
- “OT1”, “OT2”, and “OT3” appear for timesheets that have both a start and an end recorded. For what they mean, see Checking the overtime summary.
- If a no-location icon (No Location) appears next to a time, the location for that stamp could not be obtained.
- “Distance (Odometer)” is based on the odometer values that were entered. “Distance (GPS)” is the distance calculated from GPS positions. Items that were not entered or recorded show ”-”.
Depending on your settings, items such as “Additional information” (extra input fields), “Attachments” (attached images), and Double OT Hours may also appear. If they do not appear, they are disabled in your settings. Please contact DriveZ.
Checking the map
You can check the location and route on the map in the lower part of the details screen. The map is shown for timesheets that meet both of these conditions.
- A start time is recorded
- The time from start to end is within 48 hours (if there is no end yet, from the start to now)
For timesheets where the time from start to end is more than 48 hours, the location and route are not shown.
Depending on your settings, the driving route may not be shown. If it does not appear, it is disabled in your settings. Please contact DriveZ.
Reading the History
“History” at the bottom of the screen shows the operations performed on this timesheet, with the following columns.
| Column | Description |
|---|---|
| Operator Type | The type of person who performed the operation |
| Operator | The name of the person who performed the operation |
| Operation Type | The type of operation |
| Start | The start time at that point |
| End | The end time at that point |
| Operated At | The date and time of the operation |
Viewing a leave record
Click “Detail” on a row with a “Leave” badge in the list to open the “Leave Detail” screen. You can see the following items.
| Item | Description |
|---|---|
| Worker ID / Worker | The Worker the record is for |
| Attendance | Shows that it is leave (Leave) |
| Day Type | The type of the day (Work / Rest / Holiday) |
| Start / End | The start and end times of the leave |
| Salary Type | The pay category for the leave |
| Leave Type | The type of leave |
| Leave Approved By | The person who approved the leave |
| Leave Reason | The reason for the leave. ”-” if there is none. |
Leave requests are not handled on the “Approvals” screen. For details, see Approving or rejecting stamp requests.
When a day has multiple records
Depending on your settings, “Detail” on a row in the list opens the “Day Detail” screen. This screen shows all the records for the selected Worker on that day together. On this screen too, you can see the start and end times and who stamped them.